Monday, February 27, 2012

i mustache you a question...

I am so happy that I stumbled upon Pinterest and teacher blogs this last year.  Both have proven to be great sources for ideas in the classroom.  Most of my ideas for our Valentine/Friendship Theme came from the web.  

This year we made Valentines for our parents using this adorable idea I found via Pinterest.   

Here's my simplified, preschool friendly version (please forgive the smudgy pics - there was a fingerprint on my lens!):

I printed pics of the kiddos and the words "I mustache you a question..." and "Will you be my Valentine?" and cut them out.   

I found some mustache clip art that I was able to shrink to the right size on our photo copier and cut out.
I also gave the kids foam stickers to add for decoration.

My kiddos loved the idea - especially the 4's who are very into word play.  They kept repeating the "mustache" you a question line and giggling about it.   They had a great time gluing on all the pieces, writing their names, and decorating with the stickers.  

We had lots of smiling parents too : )

To collect our class Valentines, I was inspired by this folder (via Pinterest)

Our school has a ton of used manila file folders that we were able to "up-cycle". (they were very sturdy and able to hold Valentines from about 20 friends). 

Because the folder were previously used, I had to get a little crafty to get hide the writing on them.  I trimmed the top tabs off of them, but still ended up with some writing that needed to be covered.  

I decided to use our animal print duct tape (left over from our carpet squares, see post here) to cover the top of the folder.  The tape added a little funky flavor and extra support to our holders.  

After I taped the top edge, I closed the folder and stapled up the sides then wrote each student's name on the folder.  
The kiddos glued on hearts and their pictures.  

I was going to try to hang them for Valentine delivery but couldn't figure out a good place in our classroom, so we put them in file crates instead to sort their goodies into the appropriate place.


Now, I "mustache" you a question...

What were your fun ideas for Valentines & Valentine holders this year?

Miss Eileen

Friday, February 24, 2012

kids...in...space...

For most of my preschool career I've worked with 4's & 5's.  This year I took our younger class, which is a mix of 3's & 4's (half of my class is headed to Kindergarten, half will be in preschool for another year).  When you work with 4's & 5's they usually have a small foundation of background knowledge, so when you discuss topics like outer space you can build on some of the things they already know.  3's on the other hand may or may not have any knowledge of a topic and sometimes look at you like you're from another planet when you introduce a topic like outer space!  I'm appreciating the blend of knowledge in my class this year, and hope I'm giving my younger students a good foundation for next year.

Here are some of our activities we did while learning about the final frontier...

Squishy Paint Planets:

*Paper Circles, I used the centers cut from paper plates (leftover from another project)
*Paint, the students chose 2 colors
*Wax Paper

We squirted the paint onto the paper circles, topped with wax paper and squished the paint around under the wax paper.  No mess, BUT my students were not into this paint process at all - they sat down, squished for a minute and left.  (I think they would rather be messy and have paint up to their elbows!)  Even though the process failed, they came out pretty and I was able to use them to decorate : )

Space Shuttle:
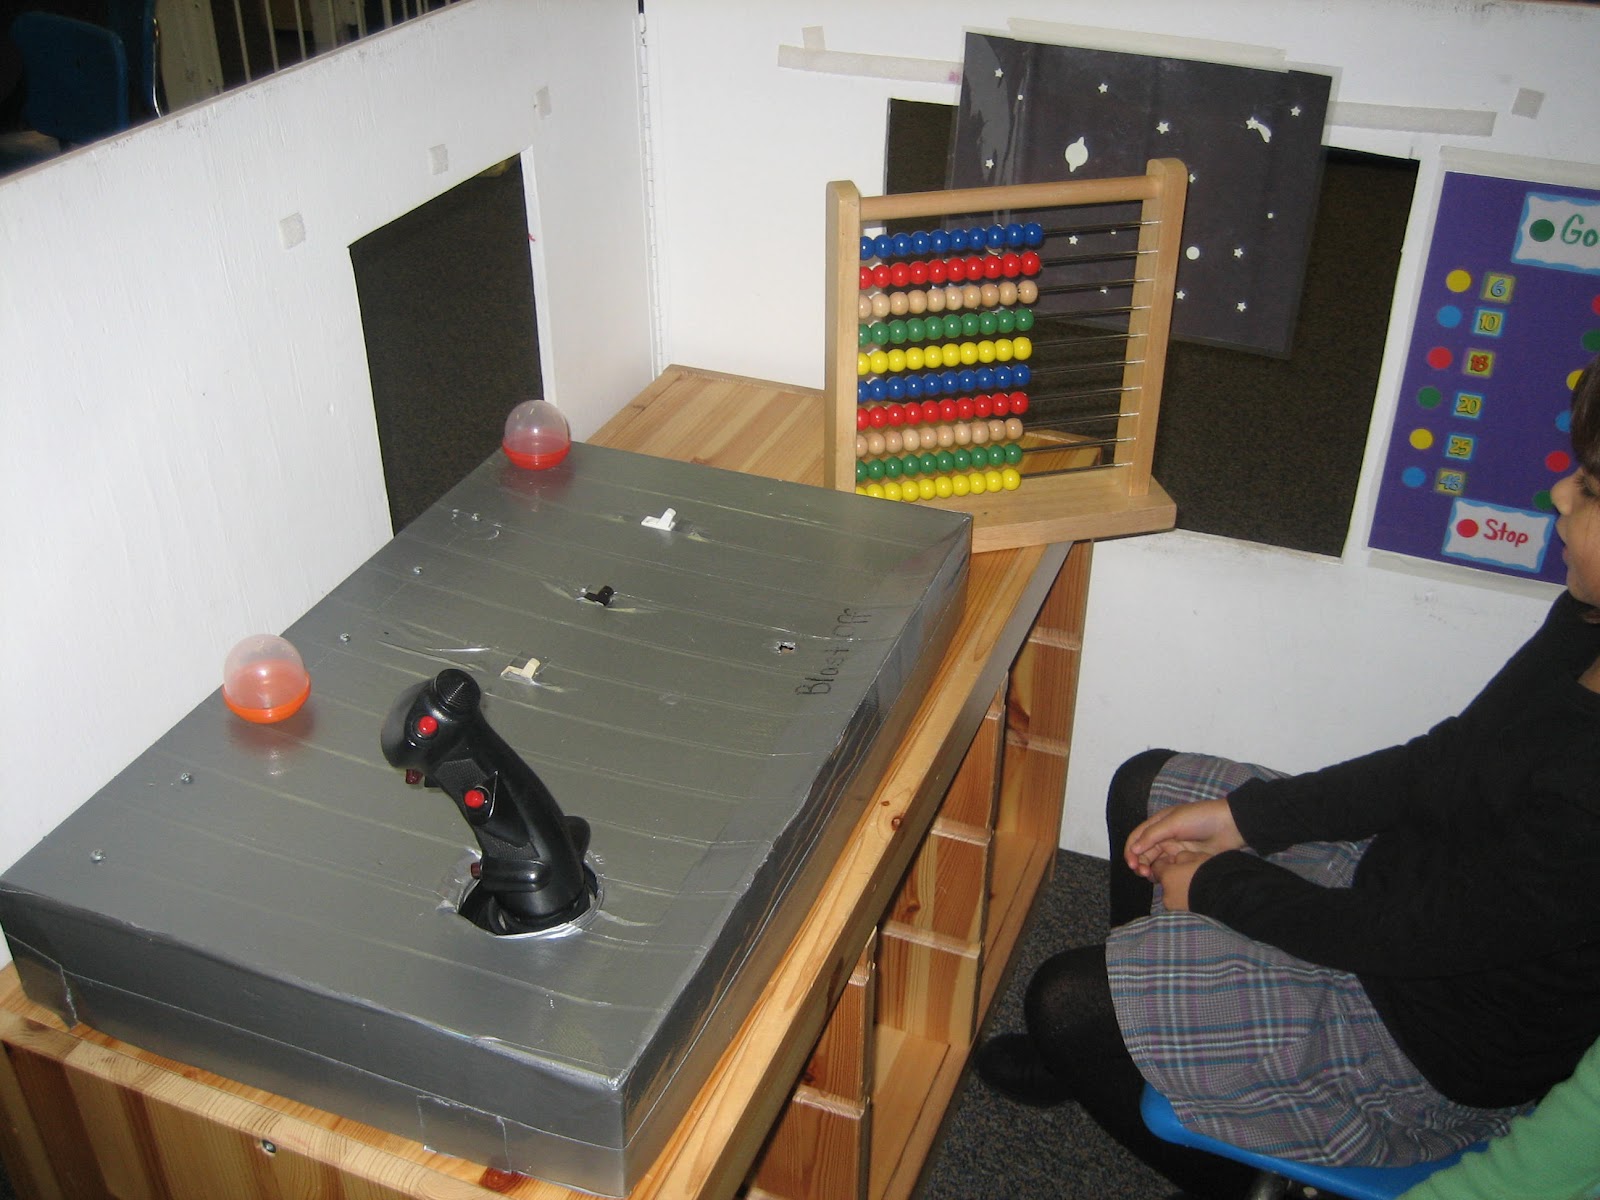
I set up our plywood "house" as a space shuttle.  (In past years I have used refrigerator boxes, but I didn't have time to procure one this year.)  I added: 

*Glow in the dark stars (stuck on black construction paper and laminated so I can reuse them)
*A "control panel" (number and dot stickers, also laminated).
*An abacus - for help in making mathematic computations ; ) 
*A flight board (which has seen better days - one of our past staff members made it out of a box, duct tape, an old video game controller, light switches, and a few other bobbles).
*Chairs for astronauts

Space Play Dough:
I made a dark purple play dough and we also used our snow dough (white with silver glitter).  
 For some creative squishing and creating I added:

*Silver pipe cleaners
*Blue floral rocks
*Wiggly eyes 


Rocket Color & Cut:

*Rocket Pattern (any picture would do!)
*Markers
*Scissors
We've been working on our scissor skills so I printed off some rocket patterns (from a Mailbox book that I have) and let them go for it.  Sometimes these simple projects  are the most constructive.  The kiddos colored, cut, and flew their rockets around our room.  One of my students carried his rocket around for several days : ).


Planet Hop 
Actually, the rocket flying became so crazy that I had to come up with a way to keep them from colliding!  I grabbed my poly-dots, placed them on the floor and gave the kiddos instructions to have their rockets hop from "planet" to "planet".  This allowed them to use their gross motor energy in a more safe and constructive way.  


Don't you love activities that emerge from necessity? ; )


Star Sort:

*Multicolored and sized stars, (created on MS Publisher, cut out, and laminated)
*Chart for sorting (my "chart" is a piece of bulletin board paper that has yet to be laminated!)

I had these stars at a table for a center activity and I also used them for group games.

To start our games I hid the stars around the room for the students to find (always fun!)
Then we would come sit down as a group and sort them by size or color.  After they are sorted we looked to count, compare and contrast.   


Name Rockets:

*Construction paper (large piece for background, pieces cut into small squares and triangles to create rocket).
*Star stickers
*Earth or planet pictures

We helped the kiddos to spell their names and place the pieces in the correct order to create their rocket.  Then they added stars, the earth, and colored.
 

Monday, February 20, 2012

heart art

Here are some heart art projects we did in our class to celebrate the Valentine season and our current "Friendship" theme.

Contact & Tissue Paper Heart:
~cut multiple colors of tissue paper into small pieces
~stick onto contact paper
~stick another piece of contact paper to "sandwich" in the tissue
~cut into the shape of a heart!

Heart Necklace:
This project is great fine motor fun!
~cut pieces of yarn into lengths long enough for a necklace that can be easily pulled over a child's head after it's tied
~finish off ends of yarn for easy threading (my co-teacher dipped the yarn in wax - it worked fabulously!)
~cut out small construction paper hearts
~cut straws into 1" segments
~kiddos use hole punchers to put holes in the hearts, then string the hearts and straws onto the yarn to create a necklace!
Heart Watercolor Painting:
~Paper (I used photo copied sheets of hearts)
~watercolor paints
This is a simple project that turns out so pretty.  I finally ordered a new set of watercolor paints, so I've been teaching the kiddos how to use them correctly so they last us longer.  ("Water, paint, paper, water, paint, paper...")

Sponge Painting:
I didn't get any photos of this process, but here's the finished product!
~sponges cut into the shapes of hearts, x's, & o's (for hugs and kisses)
~flat trays for paint
~fun colors of paint : )
I did have to remind my students that when we do prints you have to pick the sponge up without rubbing it across the paper - most of them did really well - (I usually balance a project like this with a free finger painting project another day, or if we have time, have them do one project with specific instructions, and another for exploration - I'm of the opinion that both processes are worthwhile to learn.)

What heart projects have you been doing this month?

Miss Eileen