Showing posts with label sorting. Show all posts

Monday, March 26, 2012

emm en emm oh peeee

Learning content with music works like magic - if it's learned the right way.  The "ABC" song is one of the first ways many kiddos become familiar with the alphabet.  We sing it almost daily at preschool and it's one of the most requested songs I receive from the students.  

My one complaint about our traditional ABC song (same tune as "Twinkle, Twinkle, Little Star") is that the middle of the alphabet (L,M,N,O,P) is sung rhythmically faster than all the other letters, usually making for some comical jumbled versions of the song (as sung by a 3 year old, hence the title of this post).  When I sing it with the students I usually slow down at letter L and sing very slowly for those poor letters that get jumbled together.   I also try to find other ways to sing the alphabet throughout the year,  and doing it backwards with your pre-kindergarten age students is quiet a brain workout!

All that to introduce our exploration of L, M, N, O & P (which was done slowly and deliberately - please forgive me for this epic post!).

Letter L 

Activities can be found in my post "lion around".

Letter M

"5 Little Monkeys" Printable found here


I printed and laminated the monkeys and numbers then added magnets to the back.  I put them on our magnetic easel and let the students play.  The kiddos are all familiar with the finger play so using the pictures to say the rhyme was a smooth transition.  We also pulled the monkeys into transition activities and class discussions about the letter "M".


Marble Painted "M"

 Painting with marbles is lots of fun!  

#1 Place the construction paper (ours had the letter "M" traced on it) into a plastic container.  


#2 Choose several colors of paint to squeeze onto the paper

#3 Add some marbles


#4 Put the lid on the container 

#5 Shake, rattle, and roll!
#7 Remove paper from container & let dry.

#8 Cut out your "M" : )


M & M Painting (as seen at Teach Preschool)


Sort, add water, soak then paint!  Note: The picture of the toothpaste, toothbrush, and soap was a different activity for the day that was accidentally pulled into our M&M painting by my assistant.  I'm still cracking up that we painted our "health" page with candy!

Letter N

N is for Name:  I already had the circles with letters from our names written on them from a previous activity.  We took those letters and glued them on a large "N", practicing spelling our names. 


Nuts and Bolts:  
These are a great counter/sorter/fine motor toy that I found from a catalog a few years back.  The nuts and bolts are different sizes, shapes and colors.  At a center area I placed colored paper on trays for the kiddos to sort our nuts and bolts toys onto.

For a group game we sorted all the nuts then counted and compared which color had the most and least.


Letter O

O Art:  I had lots of random left-overs in my "O" file so I decided to put all the pieces out on our art table with scissors and glue.  The kiddos had a great time gluing and cutting while talking about "O". 


We also used some left-over Cheerios to decorate our "O's" one day.


Letter P

Penguin Pajama Party!  
This group of kiddos is totally into dramatic play.  My assistant and I created a space in our classroom to celebrate penguin style.  
At the party:
  • Penguins
  • Pajamas (the kiddos worked really hard to pull them on over their clothes - we strongly encouraged them putting on the pj's by themselves)
  • Party plates, napkins, cups, etc.
  • Pompoms
  • Pears, Pineapple, and all sorts of other "food" from our kitchen : )


Purple Puffy Paint P's

We painted large "P" with purple puffy paint (a mixture of shaving cream, glue, and paint).  Fun!

Hope you enjoyed our alphabet fun - and hope L, M, N, O, & P got sorted out of their usual jumble ; )

Miss Eileen

Friday, February 24, 2012

kids...in...space...

For most of my preschool career I've worked with 4's & 5's.  This year I took our younger class, which is a mix of 3's & 4's (half of my class is headed to Kindergarten, half will be in preschool for another year).  When you work with 4's & 5's they usually have a small foundation of background knowledge, so when you discuss topics like outer space you can build on some of the things they already know.  3's on the other hand may or may not have any knowledge of a topic and sometimes look at you like you're from another planet when you introduce a topic like outer space!  I'm appreciating the blend of knowledge in my class this year, and hope I'm giving my younger students a good foundation for next year.

Here are some of our activities we did while learning about the final frontier...

Squishy Paint Planets:

*Paper Circles, I used the centers cut from paper plates (leftover from another project)
*Paint, the students chose 2 colors
*Wax Paper

We squirted the paint onto the paper circles, topped with wax paper and squished the paint around under the wax paper.  No mess, BUT my students were not into this paint process at all - they sat down, squished for a minute and left.  (I think they would rather be messy and have paint up to their elbows!)  Even though the process failed, they came out pretty and I was able to use them to decorate : )

Space Shuttle:
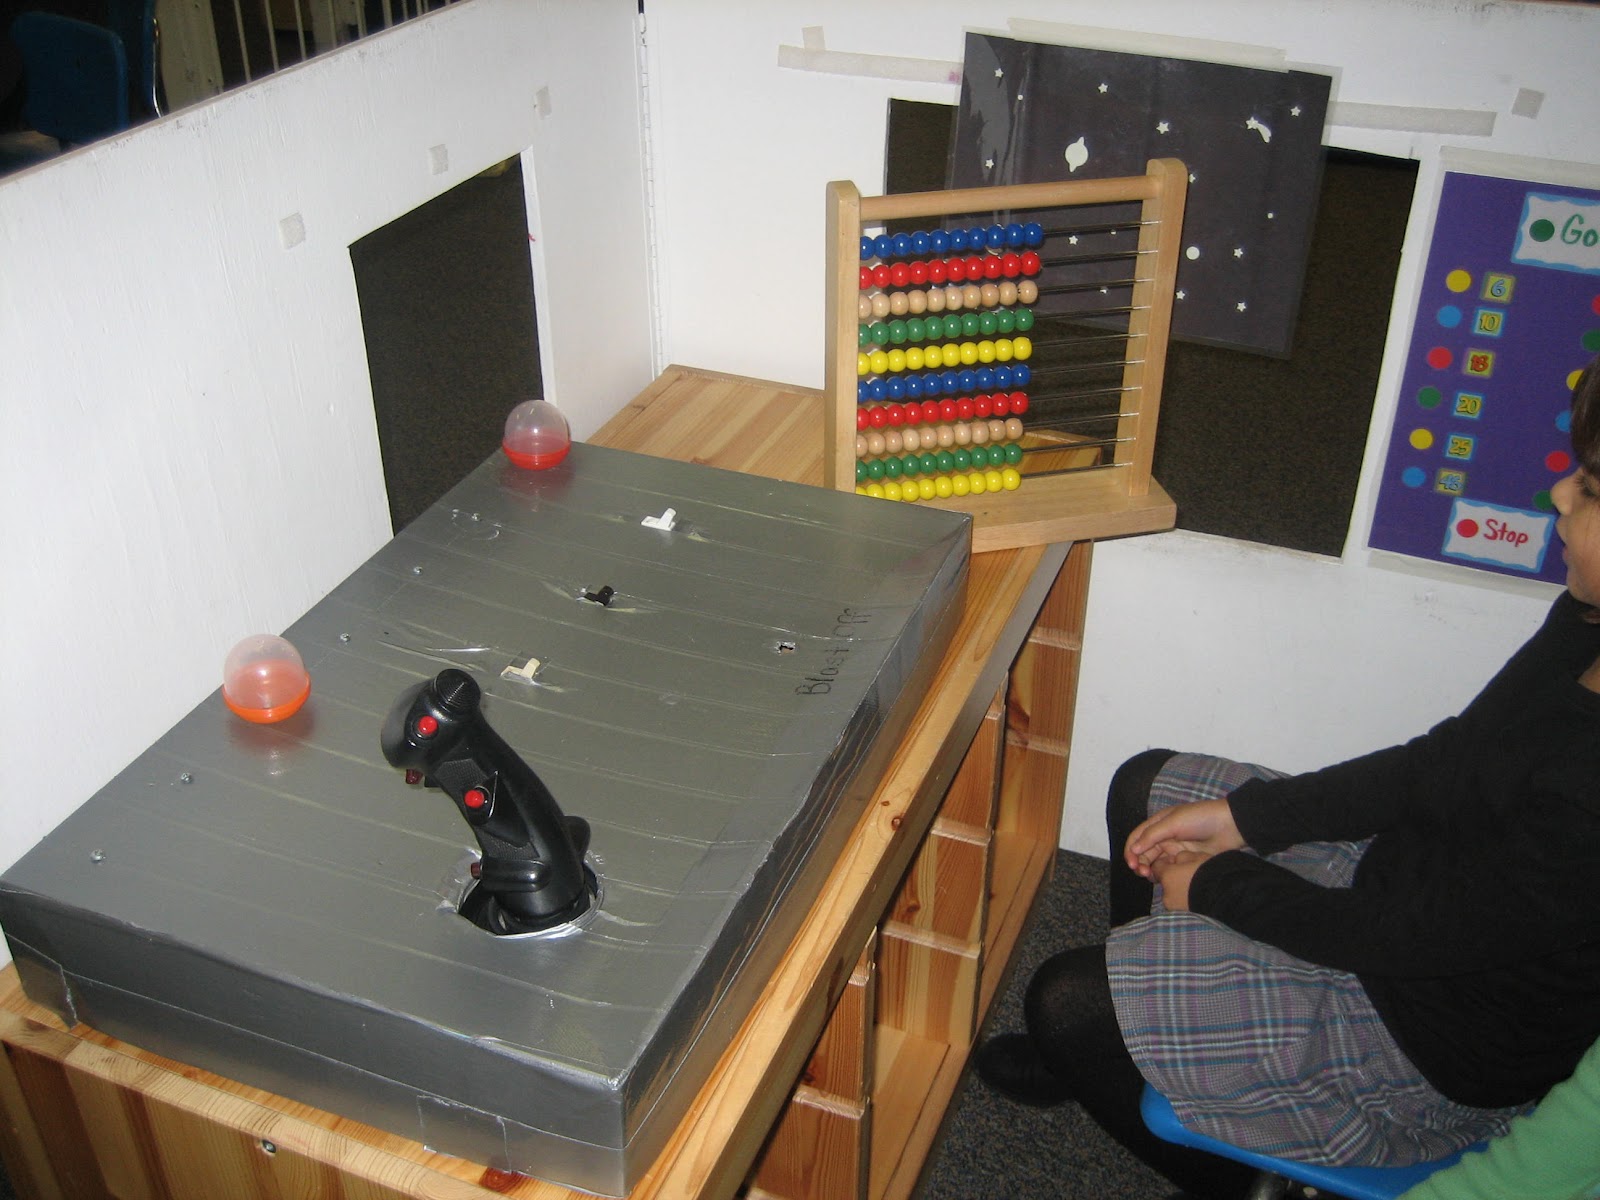
I set up our plywood "house" as a space shuttle.  (In past years I have used refrigerator boxes, but I didn't have time to procure one this year.)  I added: 

*Glow in the dark stars (stuck on black construction paper and laminated so I can reuse them)
*A "control panel" (number and dot stickers, also laminated).
*An abacus - for help in making mathematic computations ; ) 
*A flight board (which has seen better days - one of our past staff members made it out of a box, duct tape, an old video game controller, light switches, and a few other bobbles).
*Chairs for astronauts

Space Play Dough:
I made a dark purple play dough and we also used our snow dough (white with silver glitter).  
 For some creative squishing and creating I added:

*Silver pipe cleaners
*Blue floral rocks
*Wiggly eyes 


Rocket Color & Cut:

*Rocket Pattern (any picture would do!)
*Markers
*Scissors
We've been working on our scissor skills so I printed off some rocket patterns (from a Mailbox book that I have) and let them go for it.  Sometimes these simple projects  are the most constructive.  The kiddos colored, cut, and flew their rockets around our room.  One of my students carried his rocket around for several days : ).


Planet Hop 
Actually, the rocket flying became so crazy that I had to come up with a way to keep them from colliding!  I grabbed my poly-dots, placed them on the floor and gave the kiddos instructions to have their rockets hop from "planet" to "planet".  This allowed them to use their gross motor energy in a more safe and constructive way.  


Don't you love activities that emerge from necessity? ; )


Star Sort:

*Multicolored and sized stars, (created on MS Publisher, cut out, and laminated)
*Chart for sorting (my "chart" is a piece of bulletin board paper that has yet to be laminated!)

I had these stars at a table for a center activity and I also used them for group games.

To start our games I hid the stars around the room for the students to find (always fun!)
Then we would come sit down as a group and sort them by size or color.  After they are sorted we looked to count, compare and contrast.   


Name Rockets:

*Construction paper (large piece for background, pieces cut into small squares and triangles to create rocket).
*Star stickers
*Earth or planet pictures

We helped the kiddos to spell their names and place the pieces in the correct order to create their rocket.  Then they added stars, the earth, and colored.
 

Friday, January 27, 2012

krazy k

Here are some activities we did to practice the letter "K" (and some other skills!)...

K is for Kick
One of the teachers in our program did this activity with her kids last year, of course I borrowed it!  I passed out a balloon with a "K" written on it to each child.  They kicked them around for a little bit, then I pulled everyone into a line and we watched who could kick their balloon the farthest! And, of course, we kept saying "K is for kick!"

Kite Sort
For this activity I put several "kites" on the table.  The kites are laminated pieces of colored paper.   I added a bunch of different objects on a tray (objects varied in size, texture, color, etc.).  I also hole punched the kites and added ribbon for the kiddos to pull through and practice tying. 


This activity is a little random, but I had many kiddos visiting this center to sort, count, find the letter K, and explore all the different objects.  To focus this activity in a little more on the letter sound, I'd like to find some objects that start with "K" and maybe add "K" cut-outs of different colors that match the kites.

Krazy Kite Kollage "K"
 
For our large letter art activity I used things I had on hand for the students to create kite collages.  We glued diamond shapes on the "K" (for the kites) and then decorated with pieces of tissue paper and ribbon.  

Thursday, October 27, 2011

Fall Fun

What preschool classroom is complete without a little seasonal fun?  Here are some activities we did to celebrate fall over the last few weeks:


Cinnamon Play-Dough:  I found a no-bake recipe here that I thought I'd try with the kids.  It's nice to be able to make the dough in class and not have to worry about using a stove. 
 
We had a great time mixing up the dough together and we've enjoyed playing with it; adding fall leaves to the mix. 


Leaf Exploration:  I placed leaves on the table for students to explore, adding magnifying glasses to get a close-up view.  I also placed crayons and paper at the table so we could make leaf rubbings.

Leaf Graph:  We were working on comparison activities in class so I used our leaves to introduce the concept of a graph (also a great sorting and color review activity!).

Leaf Crowns:  We made crowns (inspired by childhood101.com), practicing making dots with our glue and not puddles (we were semi-successful- I had more dots than puddles : ).

Finger Paint Leaves:  This is my favorite fall project because they turn out so pretty!  I trace leaf patterns onto finger paint paper and offer the kiddos their choice of fall colors to paint with (this year we used red, yellow, and green)  I think all my students chose all of the colors but each leaf turns out different!  After they are dry I cut them out and hang them in my window for the rest of the season.


Our Little Pumpkin Patch: Outside of our playhouse I make a little pumpkin patch for us to play in.  I put brown fabric on the floor, cut out "vines" from construction paper, add garden tools and mini pumpkins and gourds.  

We have a great time picking the pumpkins and then taking them into the house to "cook" with or decorate.


Pumpkin Match: (inspired by teachers.net)  I love the idea of playing the game backwards - start with the matching pictures facing up, find the match, then flip over the card to find the pumpkin - great for younger preschoolers. 


Thursday, October 6, 2011

busy bees

My preschoolers were busy bees in our classroom this last week.  As I watch the students interact with various play areas I marveled at how different the classroom was from the previous weeks.  The kiddos were staying longer at learning centers and interacting much more with each other!
Here are some of our centers:
  • "B" is for building: At our regular building center I added in a work bench and tools to go with our blocks.  I believe at one point during the week I overheard a group of students singing "Bob the Builder" - it was a hit! 

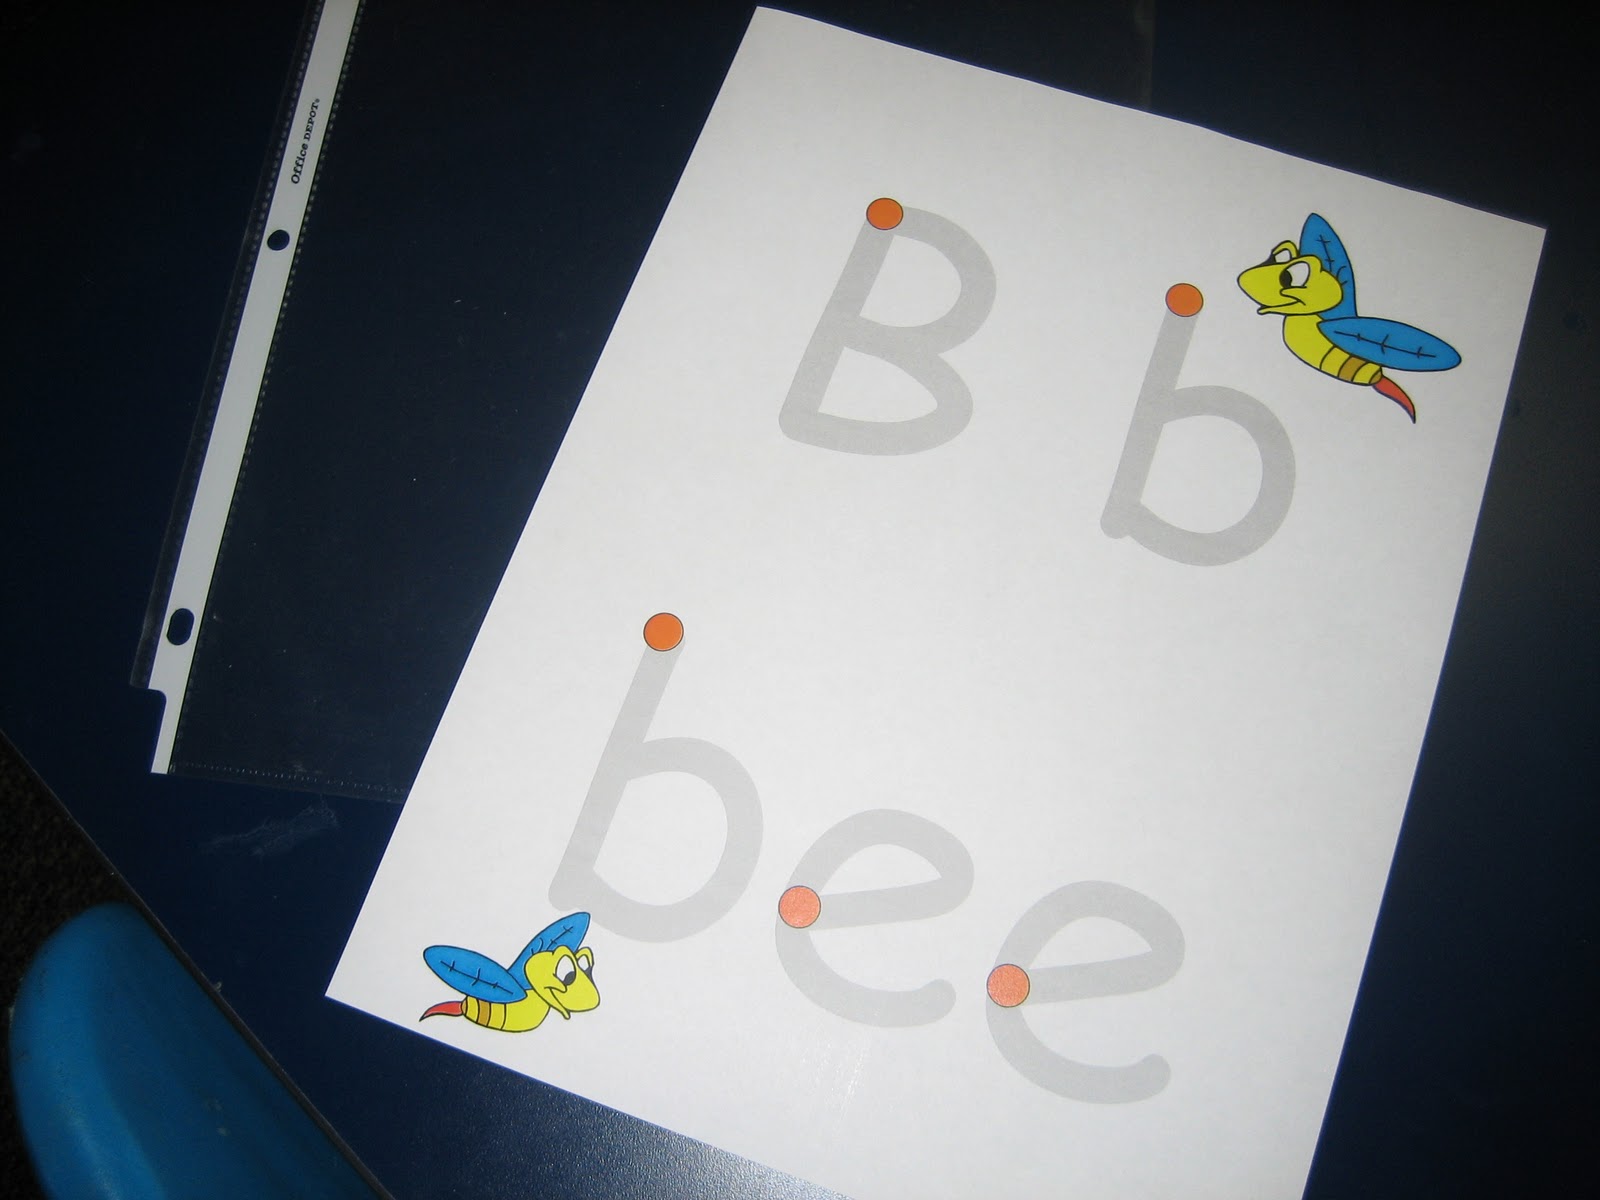
  • "B" Trace & Erase: (I picked up this idea from a pin on Pinterest and morphed it into my own) I created my own tracing pages on publisher and slipped them into page protectors.  The kiddos then used dry erase crayons to "write" on the pages - just erase and reuse.  (Note: to "super" clean the page protectors I used a magic eraser since the dry erase crayons leave behind a little residue)


  • Bee/Flower Count & Match:  I found this game in a Mailbox Numbers book.  The pictures are photocopied onto card stock & laminated.  The bees are glued onto clothes pins.   The object; count the flowers and pin to the correct, numbered bee.


  • Big & Little: We are working on size sorting so I placed "big" and "little" flash cards on two separate trays.  In the middle I placed a container of big and little beans (lima & pinto respectively).  We sorted the beans onto the correct tray. 

  • Sorting Fish, Color & Size:  This game was created by a fellow teacher and I have no idea if the game came from her imagination or from a source - but it's great!  She created game cards with squares that go from small to large.  There are fish cards that match the size and color of the game cards - great sorting activity!


  •  Butterfly "B's":  We had a great time making this project, just glue 2 letter "B" cut-outs back to back onto a large piece of construction paper, add a circle cut-out for the butterfly's head, draw on a face, tape a piece of pipe cleaner to the back side of the paper for antennae, and decorate (we used dot painters) - "B"eautiful!
Love the lips!