Showing posts with label play-dough. Show all posts

Friday, February 24, 2012

kids...in...space...

For most of my preschool career I've worked with 4's & 5's.  This year I took our younger class, which is a mix of 3's & 4's (half of my class is headed to Kindergarten, half will be in preschool for another year).  When you work with 4's & 5's they usually have a small foundation of background knowledge, so when you discuss topics like outer space you can build on some of the things they already know.  3's on the other hand may or may not have any knowledge of a topic and sometimes look at you like you're from another planet when you introduce a topic like outer space!  I'm appreciating the blend of knowledge in my class this year, and hope I'm giving my younger students a good foundation for next year.

Here are some of our activities we did while learning about the final frontier...

Squishy Paint Planets:

*Paper Circles, I used the centers cut from paper plates (leftover from another project)
*Paint, the students chose 2 colors
*Wax Paper

We squirted the paint onto the paper circles, topped with wax paper and squished the paint around under the wax paper.  No mess, BUT my students were not into this paint process at all - they sat down, squished for a minute and left.  (I think they would rather be messy and have paint up to their elbows!)  Even though the process failed, they came out pretty and I was able to use them to decorate : )

Space Shuttle:
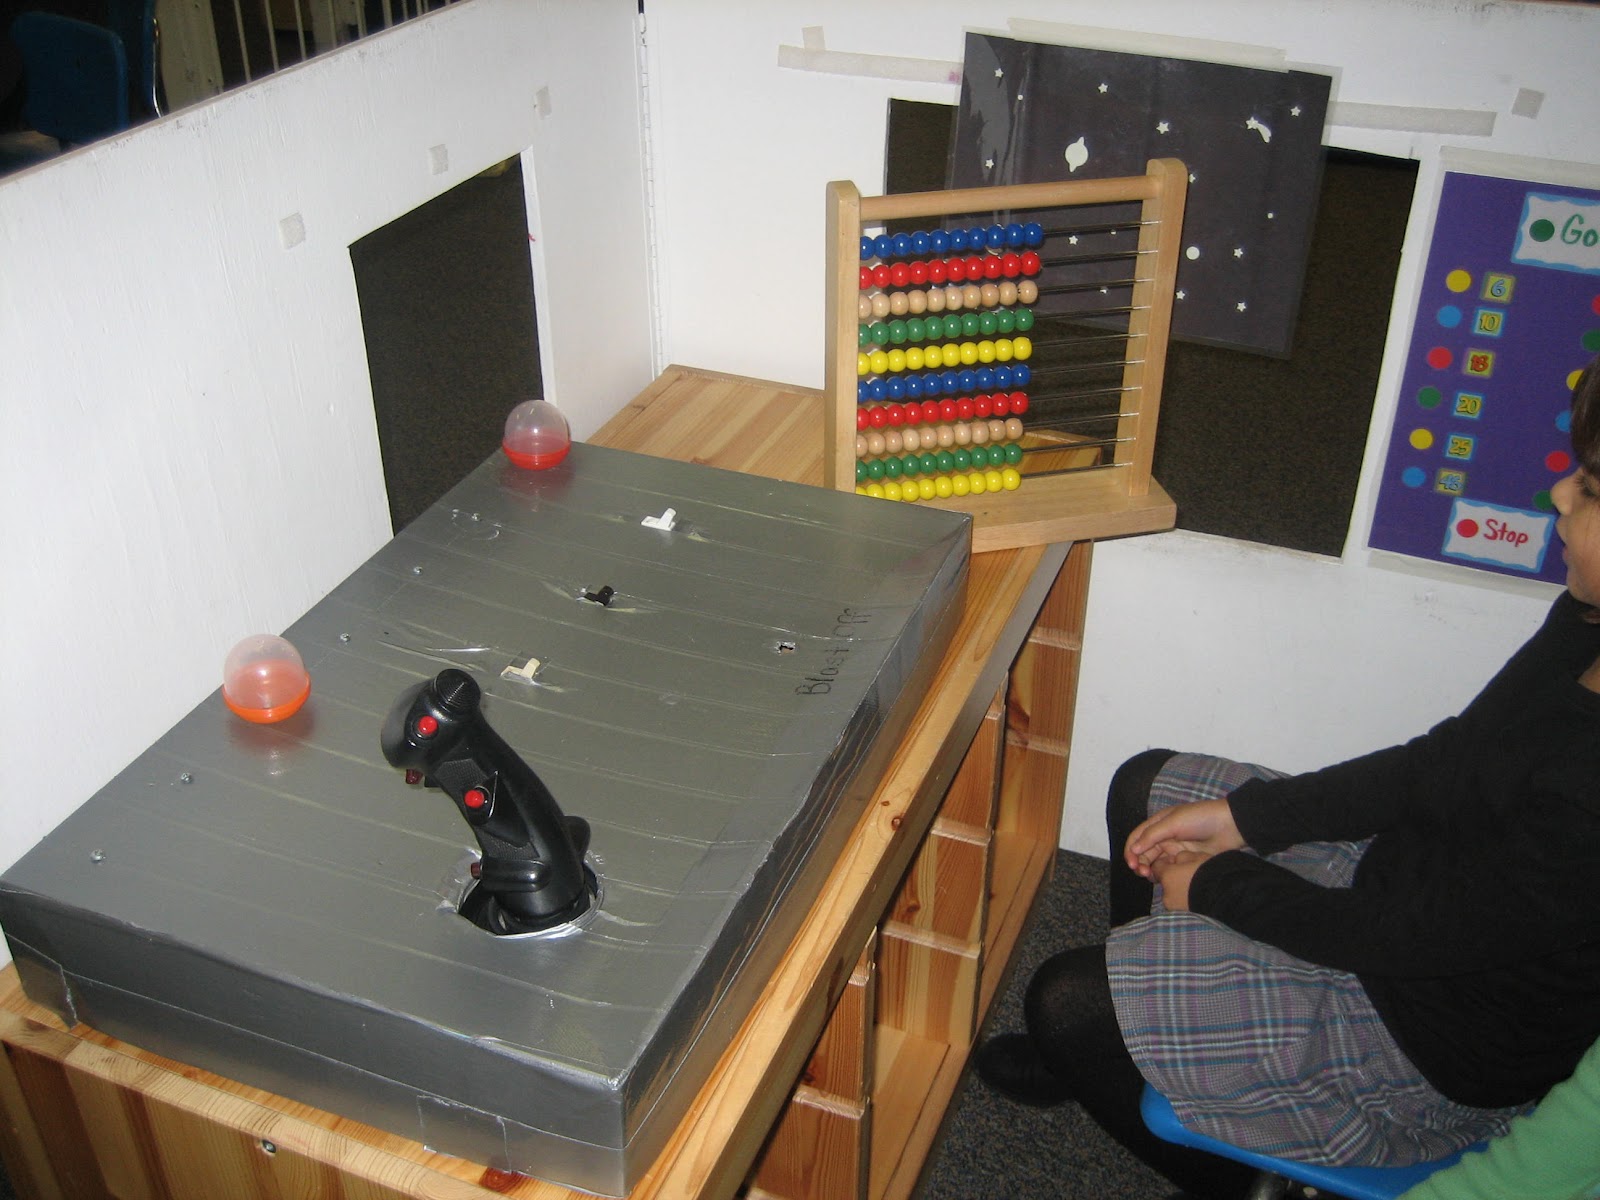
I set up our plywood "house" as a space shuttle.  (In past years I have used refrigerator boxes, but I didn't have time to procure one this year.)  I added: 

*Glow in the dark stars (stuck on black construction paper and laminated so I can reuse them)
*A "control panel" (number and dot stickers, also laminated).
*An abacus - for help in making mathematic computations ; ) 
*A flight board (which has seen better days - one of our past staff members made it out of a box, duct tape, an old video game controller, light switches, and a few other bobbles).
*Chairs for astronauts

Space Play Dough:
I made a dark purple play dough and we also used our snow dough (white with silver glitter).  
 For some creative squishing and creating I added:

*Silver pipe cleaners
*Blue floral rocks
*Wiggly eyes 


Rocket Color & Cut:

*Rocket Pattern (any picture would do!)
*Markers
*Scissors
We've been working on our scissor skills so I printed off some rocket patterns (from a Mailbox book that I have) and let them go for it.  Sometimes these simple projects  are the most constructive.  The kiddos colored, cut, and flew their rockets around our room.  One of my students carried his rocket around for several days : ).


Planet Hop 
Actually, the rocket flying became so crazy that I had to come up with a way to keep them from colliding!  I grabbed my poly-dots, placed them on the floor and gave the kiddos instructions to have their rockets hop from "planet" to "planet".  This allowed them to use their gross motor energy in a more safe and constructive way.  


Don't you love activities that emerge from necessity? ; )


Star Sort:

*Multicolored and sized stars, (created on MS Publisher, cut out, and laminated)
*Chart for sorting (my "chart" is a piece of bulletin board paper that has yet to be laminated!)

I had these stars at a table for a center activity and I also used them for group games.

To start our games I hid the stars around the room for the students to find (always fun!)
Then we would come sit down as a group and sort them by size or color.  After they are sorted we looked to count, compare and contrast.   


Name Rockets:

*Construction paper (large piece for background, pieces cut into small squares and triangles to create rocket).
*Star stickers
*Earth or planet pictures

We helped the kiddos to spell their names and place the pieces in the correct order to create their rocket.  Then they added stars, the earth, and colored.
 

Saturday, January 7, 2012

baby it's cold inside: winter play

Living at a low altitude in the northwest doesn't lend itself to many snow experiences.  About once a year we may have a snow "event" (and trust me - it's ant EVENT when it happens) but generally, to experience "winter" you have to travel to the mountains.  
Some of my preschoolers have not had that experience so I hope I've enlightened them with some pretend winter fun.

Here's what we did:

*housekeeping, winter dress-up:
I found gloves and hats at the $ store, bought matching colored sets, and added them to our housekeeping  (dramatic play) area.  What fun!
I observed:
  • pretend snowball fights and snow angel making (too bad the carpet doesn't leave an impression!)
  • fingers working hard to fit into the correct holes in the gloves
  • color matching; choosing the hats and gloves that were the same color
  • hats being worn by my lion-headed chairs (wish I had taken a picture!)


*building, felt snowmen:
(inspired by Frugal fun 4 boys)
I went super simple and used felt I had on hand to make the shapes.  The kiddos played on and off at this center, arranging and rearranging all the pieces.


* sensory/science, ice:
We're blessed to have an ice machine on campus : ) in the morning we filled up a bucket with ice to pour into our sensory table.  I added polar bears and penguins for imaginary play.
*gross motor, snowman toss:
I found this activity at the Little Illuminations blog.  Ayn had covered her pieces in contact paper to stick them to the mesh pop-up hamper.  She ended up stapling the face on because the contact paper didn't stick well to the fabric.  I tried a few sticky alternatives without much luck.  
 
  • First, I tried double-stick tape which worked until they were hit with the bean bag.  The students did their best to reapply the face - it was comical to look every once-in-a-while and see the face rearranged.
  • Next, I tried velcro on the back of the pieces, but they fell off too.
  • I finally put the pieces onto a piece of white paper and taped it onto the hamper.  This worked OK, but I'm still looking for ideas...
One of my students commented that the snowman looked angry... I said "I'd probably look that way too if someone was throwing beanbags at my face!" : )
Any thoughts on how to make the pieces stick better (without being permanent)?

*dollhouse/car table, snow play:
I was planning on making a cute winter village like the one here at Toddler Approved. But, time got away from me so I pulled out our doll house, put it on our car table, and added buffalo snow around the house.  It was a success and I think the snow will stay on our car table through some of our transportation unit too : ).


*play-dough, snow style:
I'm going to start working my way through the Mudworks book - a great resource for all things dough related...

I used their basic, cooked, salt play-dough recipe (it turned out great) and added silver glitter during the kneading process.  We also used these playdough math mats from Prekinders for some counting fun.

*color match, snowman clothes:
I printed and laminated these matching cards from Prek + k sharing- so cute!  Loving the free resources from everyone's blogs - it saves so much time!

Thursday, October 27, 2011

Fall Fun

What preschool classroom is complete without a little seasonal fun?  Here are some activities we did to celebrate fall over the last few weeks:


Cinnamon Play-Dough:  I found a no-bake recipe here that I thought I'd try with the kids.  It's nice to be able to make the dough in class and not have to worry about using a stove. 
 
We had a great time mixing up the dough together and we've enjoyed playing with it; adding fall leaves to the mix. 


Leaf Exploration:  I placed leaves on the table for students to explore, adding magnifying glasses to get a close-up view.  I also placed crayons and paper at the table so we could make leaf rubbings.

Leaf Graph:  We were working on comparison activities in class so I used our leaves to introduce the concept of a graph (also a great sorting and color review activity!).

Leaf Crowns:  We made crowns (inspired by childhood101.com), practicing making dots with our glue and not puddles (we were semi-successful- I had more dots than puddles : ).

Finger Paint Leaves:  This is my favorite fall project because they turn out so pretty!  I trace leaf patterns onto finger paint paper and offer the kiddos their choice of fall colors to paint with (this year we used red, yellow, and green)  I think all my students chose all of the colors but each leaf turns out different!  After they are dry I cut them out and hang them in my window for the rest of the season.


Our Little Pumpkin Patch: Outside of our playhouse I make a little pumpkin patch for us to play in.  I put brown fabric on the floor, cut out "vines" from construction paper, add garden tools and mini pumpkins and gourds.  

We have a great time picking the pumpkins and then taking them into the house to "cook" with or decorate.


Pumpkin Match: (inspired by teachers.net)  I love the idea of playing the game backwards - start with the matching pictures facing up, find the match, then flip over the card to find the pumpkin - great for younger preschoolers.