Wednesday, December 28, 2011

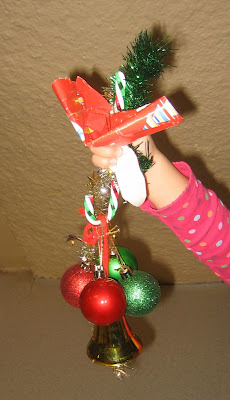
sensory table, Christmas style

My sensory table has been hit and miss with my students this year.  With past groups of kids it's been a hot spot, needing a timer and refereeing for turn taking.  But this year is different... same activities, different kids... hmmm...

FINALLY, my Christmas mix was a hit (and I didn't have much faith in it when I put it together)!

Ingredients:
  • Wrapping paper (cut into smallish pieces)
  • Garland (also cut into smaller strips)
  • Bows and ribbon
  • $ store bauble ornaments (plastic so they won't break easy - I'd say they're unbreakable, but with preschoolers you never know...)
  • Plastic candy canes (also found at the $ store and I need more!) 
  • Bell ornaments


What I observed:
Lots of sorting, hiding, finding, crumpling, AND...

Bell Banging, using the plastic candy canes for percussion (accompanied by beautiful singing)
Gift Wrapping


Ornament Creating
(using the candy canes as hangers)


Tracing???... someone took the candy canes on a field trip to our art table for some tracing time - great idea!
So glad that this mix worked for my students.  Now to come up with some new ideas for next week...

Tuesday, December 27, 2011

simple personalized ornament

In the past I've been much more elaborate with a craft for the kiddos to make their parents as a keepsake.  This year I had a very hard time feeling inspired or finding the time for the students to put their gifts together.  After combing the web for ideas, I settled on a simple paper craft for the students to make.  I am actually pleased by the results, but am hoping I'll find more time next year to actually wrap our gifts and be able to give them out to families at our program.

Our ornaments:  (Inspired by toddlerapproved.blogspot.com)

#1: We had fun finger painting with red and green paint.  The dried paintings were multi-tasking art projects; from the large paper I cut out 2 stars (one for our school's bulletin board, and one to take home)  and a small 3"x3" square for our ornament.
 
#2: I cut out 4"x4" squares of red poster board for the backing.  The slightly larger square also created a border for the painted square.  I wrote each student's name and date on the back of the square with a metallic marker.

#3: The students glued the 2 squares together and added two pieces of ribbon, criss-crossed to looked like a wrapped present.

#4: When the "presents" were dry I added a student picture to the middle.

#5: I hole punched the top and put a piece of pipe cleaner through the hole.  I fashioned half of the pipe cleaner into a bow for the top of the present and the other half into a loop for hanging.

#6: We gave them away to smiling families!

Merry Christmas!

Saturday, December 24, 2011

Ii...eye...aye...Ii

We had some inchworm fun to help learn about letter "Ii".  Thanks to Deborah from Teach Preschool I had some activities at my fingertips - great for a busy time of year : )


Big "I" with Inchworms - Hiding in the Grass (Inspiration here) :  We glued small green rectangles on our capital "I's".  We tried to glue the worms bending, but most of my students liked the ease of gluing them flat.  


After we were done with the glue, we painted grass for the worms to hide in, using the tines of a fork.

Find the Inchworms! (Inspiration here):  I can't believe I've never thought of using pipe cleaner and magnets together - great combo!  For this center, I put some grass (green and brown gift bag filler, found a the dollar store) in a container.  I added some inchworms (green pipe cleaner) and magnetic wands. 
My kiddos LOVED this activity.  I'm going to bring it back in a few weeks and add some magnetic alphabet letters to the mix for some review fun. 


Other activities in our classroom:

Nativity Building Center:  I've had a plastic Nativity set mixed with our blocks for the last four weeks and it's still a popular spot to play.  Every once in a while baby Jesus disappears (he's a hot item!) but he is eventually retrieved to place in whatever version of a stable is being constructed. 

Christmas Card Art:  I had a huge bag of Christmas card fronts donated to our school.  I put the cards, construction paper, scissors, glue and markers out at our art table for the kiddos to be creative with.  My smallest students are just getting comfortable with using scissors and glue so it was great practice for them. I love seeing their creativity start to blossom when the use of art tools becomes more familiar.


Friday, December 23, 2011

measuring up

One of the math focuses in our curriculum is an introduction to measurement. The following are some activities I've used in our classroom to introduce measurement concepts.

Full & Empty:  To demonstrate the idea of full and empty I put the containers from our balance scale on a tray with corn to pour from container to container.  As the students played we would ask from time to time which container was full or empty.  We would also challenge them to make one full or empty.

Heavy & Light:   We played with our balance scale and sized elephant counters.  While students explored we talked about how the scale worked, showing which container was heavy or light.  I also encouraged my older students to sort the elephants by color to see which group was the heaviest. 


Long & Short: 
Play dough mats.  I drew a long and short rectangle on a piece of paper and put the paper inside a page protector.  I encouraged the students to make the play dough match the lines, to make one piece long and one piece short.  Some of the students used scissors to cut the play dough to size.
Measuring with Yarn:  This is one of my favorite length activities, although it takes some patience on the students part to wait for everyone to be measured.  It might be a good idea to measure everyone with a length of yarn as they come in the door in the morning, but it was fun to watch everyone get measured too.  
I cut a length of yarn to match each students height.  I wrote their name on a piece of tape and attached the yarn to the wall.  After everyone is hanging we compare the different lengths, seeing who is long and who is short!

Thursday, December 15, 2011

horse play

This year is galloping by!  We did a little horsing around with letter "H" this last week:


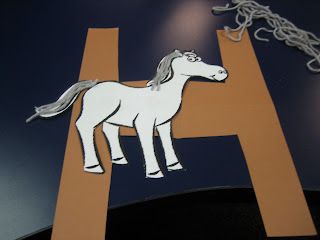
"H" Horses: This project was a little too teacher labor intensive (lots of cutting - I think I'll do something different next year). 

I did like having the kiddos use scissors to cut the yarn and glue onto the horse's mane and tail.   
 Horse Play: I've been seeing all these ideas on blogs about setting up miniature pretend play areas.  I gave it a whirl with our plastic  horses.  (The blue tray was the quickest container that I could come up with that was a good size.  I think a box lid with some 2-3' sides would work well too. ) I taped green construction paper on top, added plastic trees, fence pieces from our farm sets, a little green tinsel (for grass) and our small plastic horses.  

My 3's didn't care much for this activity - they pulled things off the tray and wanted to carry the horses around the room.  My 4's, however, have been playing with the tray for 3 weeks now - it's a hit!


Other games we're playing:

Star Count and Match:   (idea from the Mailbox Numbers for Little Learners book)
  • Felt board
  • Felt stars
  • Number flash cards
For this game we sat in a circle around our felt board.  I had the students close their eyes while I put a certain amount of stars on the board.  Then they opened their eyes and I chose someone to count how many stars.  

After we counted I put two number flash cards out and we chose which number matched the amount of stars.

Bean Toss: (idea from prekinders.com)

  • Tray /felt
  • Cup 
  • Lima beans (painted on one side)
Toss the beans on the tray, sort the white from the red.  Which is more? Which is less?   Which color wins?


 Block Stack, More & Less: (also from prekinders.com)
  • Blocks (same size and shape)
  • Die
We played a version of a block stack game a few weeks earlier, so the kids were familiar with the concept.  We rolled the die, counted the dots and stacked the corresponding amount of blocks.  Then we rolled the die a second time, made another stack of blocks and compared stacks.