Tuesday, November 29, 2011

thankful...

Hanging on the Line: Simple turkeys that my students could put together on their own... inspired by this blog


How crazy is it that we do all sorts of cute turkey activities during Thanksgiving season and then try to translate the cute turkeys into what's for dinner?  My kiddos don't get it and I don't get it either...

Here's a look at our cute turkeys (anyway) and  some other Thanksgiving activities...
Hand Turkeys (inspired by this blog):  I had about 15 lined up on my counter at one point, soooo cute!
  • Cardstock (to trace hands)
  • Feathers
  • Markers
  • Glue
  • Orange triangle cut outs (for beaks)
  • clothes pins  (these could be painted or colored with marker too)
My students were able to do most of this project on their own too - I just traced and cut out the hands.

Turkey Math

Magnetic Turkey/ Triangle Count: Give each turkey the correct number of triangles to match their number!  (Our shape focus this month is a triangle.)
Turkey Number Match: This game was passed on to me by a fellow teacher (I'm guessing it's from the internet somewhere...)  The turkey bodies have a number on them and matching numbered tail feathers.  This game can also be used for color sorting.


Our teepee (with a fire blazing underneath)!  I added a few dress-up items too (Native American head bands, fringed t-shirt).  We talked about what kinds of food the Native Americans would have cooked while we played here (no processed food here : ). 
Corncob Sensory Bin: I've seen this activity multiple places on the web.  The kiddos love to pick the corn off of the cob.  When the cobs are clean...
We paint with them! (Note: in past years the kiddos have loved to paint with the cobs - this group of students, HOWEVER, did not - they ran the cob across the paper a few times, set it down, and finger painted instead - you just never know!)
 Turkey Baster Squeeze:  (Inspired by a painting project here.)  I decided not to actually paint, but to use colored water (I mixed a little paint in the water).  We squirted on trays to let the students experiment with the basters a little more.  I don't think a piece of paper could have held up to all the squirting we had going on!  I also added smaller pipettes to experiment with.  
Left-overs:  As my students gain skills in using our classroom tools (glue, scissors, etc.) I like to turn them loose on creative art projects.  One day I put out all our left-over turkey pieces and let them create whatever their hearts desired!

All in all we had a great Thanksgiving season in our preschool.  I'm thankful for great kiddos to spend my days with!

<3 Eileen


Monday, November 28, 2011

got your goat?

Anyone out there have any good goat activities?  Our animal friend for letter "Gg" is "Gomer Goat".  I had plenty to do this week so I wasn't able to dig very deeply into more activities, but I'd like to find more in the future.  I think I might need to invest in a copy of "The Three Billy Goat's Gruff" for next year.  

Letter "G" activities...

"G" Goats (I think these are pretty hilarious) I found the idea here.
  • Cut outs of the letter "G", horns, ears, and beard
  • Large wiggle eye (you might want to do two - I can never get the preschoolers to understand the concept of putting one eye on an animal art project - ha!)
  • Glue
I give the students the pieces, show them an example, and let them glue as they choose. 

For an alphabet review game we played  "Throw it in the Garbage" (great mix of fine and gross motor skills!).
  • Garbage Can
  • Paper scraps with alphabet letters written on them
To play:
  • Pass out the letters written on the paper to the students.  
  • Take turns naming the letter
  • Crumple and toss into the garbage can.  

When we all had a turn, I dumped the can and students chose a piece of paper again.  
  • Uncrumple the paper to find out what letter is hiding inside!
  • Crumple it back up again.
  • Toss into the garbage.  
(This was in my lesson plans from last year, but I know I just saw it on a blog recently too - can't remember where!)

Other activities this week:

Craft sticks (letter recognition, math, fine motor skills):  I put craft sticks and flash cards out at a center area for students to use to make shapes and letters.  I saw a lot of really neat designs/letters from my older students and my youngest students thought it was great fun to grab them all in their hands and drop them (they do make a cool sound... as well as a mess).
Table Setting (one-to-one correspondence, social studies):  During the month of November I add place mats to our housekeeping area.  To make the place mats, I traced the toy dishes (as they would go on a set table) on a large piece of card stock.  Then I decorated and laminated the mat.  Looks like a healthy meal!.  

Friday, November 25, 2011

goin' fishin'

There are so many things to do in the classroom at this time of the year.  I'm afraid  I try to do too much so the kiddos can experience it all - at least I keep them busy!


For letter "F" I pulled out our magnetic fishing set.  I used the toys for a group game as well as a center.  I purposefully use one fishing pole to encourage sharing and taking turns - the rule is catch 1, pass the pole to a friend.  (Multiple poles get tangled or turned into weapons anyway, so it solves that problem too : )


Love that this student sorted out all the pink fish : )
Our "F" project ended up taking a back seat because we had so many other things going on this week.  A few students were able to put one together though.  I went super simple, using left-overs from past projects.  We glued fish cut-outs on the large "F" and I had some "F Fish" words that we glued on also.


Other skills we are working on:

Associations (language skills): I put out a game that has pictures of objects that go together.  The pictures are puzzle cut so only the correct pictures fit together.


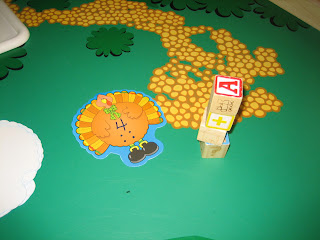
Block Stacking (number recognition, one-to-one correspondence, and fine motor skills):  We played it as a group game and I tried to use it as a center, but it wasn't very popular.
  • Turkey number flash cards
  • Alphabet blocks
To play: Turn the flash cards upside down, flip over to see how many blocks to stack


Opening and Closing Containers (fine-motor skills):
  • Various containers, some with lids, some without (I even included lids that did not fit on containers)
  • Small Animals

The most popular activity I witnessed was finding all the bugs and putting them into the screw-top containers.

Easel Painting (fine motor, color discrimination, art!):  I introduced easel painting to the kiddos.  Because it was the first time for many, I only used 2 colors (red & yellow) so they could get used to the process and so we would not have an overwhelming mess!  Most of the paintings were one orange blob, but a few of my students (especially the ones who had multiple turns) actually painted pictures.  My goal is to have the easels out more frequently so the kiddos can become more creative with their painting.


Tuesday, November 8, 2011

the elephant in the room

Did you know that elephants walk on their toes?  That's one of the things we learned while focusing on the letter "E" this last week.  We also learned that our noses are not nearly as talented as an elephant's.  How would you like to pick up a peanut with your nose? : )


For our letter "E" project I wanted to make an elephant out of the letter shape, but my plans were altered when I found a TON of copies of an elephant printable that were sitting in my files and needing to be used.  Cutting out lots of tiny pieces for a project is not my favorite thing to do, but for the sake of stewardship I went for it...

We cut out the elephant pieces and gave them to the students to glue on to their "E".  I gave them a sample to look at, but let them choose how they wanted to glue it themselves.  

After we glued, we painted the letters with sponge painters and gray paint.  

(Note: If I do the project this way again I'll trace an "E" onto a larger piece of paper and cut out the letter shape AFTER the paint is dry - then the paper won't curl so much.)  Our "E's" turned out great and the students seemed to have a good time gluing and painting.


In our sensory table I added plastic eggs to the corn.  This combo made some great rhythm instruments!  The plastic eggs are also great for those hands - it takes a little work to get them open and closed.


We used craft sticks to make "E", practicing using white glue to put the sticks on our paper. We also added pictures of things that begin with an "E" (eggs, elephants, envelopes, etc...) to our collage. Getting the craft sticks to make a letter "E" was a little difficult for my younger students.  I'll have to get out craft sticks more often to play with to make shapes and letters.

Other activities this week included:

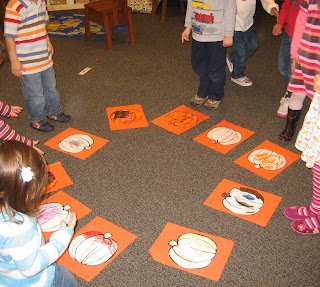
Pumpkin Walk:
  • Place pumpkin flash cards (made with our current alphabet letters on the back) in a circle on the floor
  • Turn on some music and walk around the circle
  • When the music stops, pick up the pumpkin you are closest to and see what letter is hiding on the other side
  • Take turns around the circle to share what letter you have


Pumpkin Seed Counting:
  • Write numbers on  paperplates
  • Add a container of pumpkin seeds
  • Count the seeds onto the plate to match the number (if you look closely you can see that we still need more practice!)
Fall Roll and Count:
  • Die (only includes #s 1-3)
  • Acorns
  • Leaf Math Mat
  • Roll the die and count the corresponding number of acorns onto the mat

Sunday, November 6, 2011

donkeys and dinosaurs

For letter D, our Abeka Animal Friend is "Dexter Donkey".  I wanted to find some more activities that centered around the donkey theme, but we had so many other activities happening this week that I didn't have time.   We did play a few rounds of "Pin the D on the Donkey", using the game to practice recognition skills.


There are so many fun things in our world that begin with the letter D!  I couldn't resist using a dinosaur for our "D" creation.
I cut out big "D's", gave the students paper shapes and a glue stick and let them create their own dino.

Other activities this week included:

Rectangle Match:  I made a math mat (using Publisher) with various sized red and orange rectangle outlines, then made rectangle cutouts to match the outlines.


Farm Magnets:  We are learning about the farm this month so the farm magnet board came out to play!

Creation Puzzles: (from here) One of my teachers put these together last year.  They were a great review tool while we were learning about how God made the world.