Pages

Wednesday, December 5, 2012

Scales and Hooves

Last year I did a large letter cut-out art project to go with each of our alphabet letters.  This year, instead, I'm being a little more flexible and doing various projects that focus on the letter or animal that we are learning about. 

"F" is for Felt Fish

This was a fun, colorful, project with a sensory aspect to it.  
Here's what you need:

*Printed fish pattern (Google "Fish Pattern" and you have all sorts of choices)
*Scissors
*Large sheets of construction paper
*Various colors of felt, cut into scale shapes
*White glue
*Googly eyes
*Markers


We cut out the fish pattern and the students were given the choice to glue it to a larger sheet of construction paper.  Then they added the felt fish scales and googly eye.  Some of the students who glued their fish to the paper used markers to draw other things that might be under the water with their fish.  

The felt was a different type of texture for us to work with on an art project.  The kiddos liked picking out what colors they wanted.  We also had good practice squeezing white glue out of the bottle to make dots.

Hoof Print/Foot Print

Our animal for letter "G" is a goat.  I was racking my brain and the internet for ideas with no luck, (there really aren't that many goat art project ideas out there) so I got creative with a science/art project.

I prompted my kiddos with the question: "Do goats have toes?"  Then we discussed how goat feet are different from our feet.  

To help visualize what a hoof print looks like I decided to make my own hoof print stamp.  

First, I printed out a pattern of a goat hoof print (gotta love Google images!).  I cut the pattern out and traced the shape onto craft foam.  (I had pretty thin foam, so I tripled the foam up so it was thicker.)  Next, I glued the foam onto a plastic lid to form my stamp (note: if I do this again I will make the stamp a little smaller so it will be more relative to the size of the kids feet - this print is from one giant goat!).
 
 
For the project I showed the kiddos a picture of goat hooves and what it looked like when the goat left a print.  Then I had them use the stamp and a large stamp pad to make their own prints on a piece of paper.  


My adventurous students went one "step" further (ha, ha I made a punny!) - they let me paint their foot so they could make their own foot print next to the goat hoof print.


When the project was done we could compare and contrast the differences!


Wednesday, November 14, 2012

Target Practice

Throwing things seems to come naturally for kiddos - in fact just today I had a student who chose to throw things all over my room and ended up having a big clean-up job at the end of his adventures.

A few weeks ago we put some structure to the tendency to throw things by playing a game.

First we had to create a target.  I got a piece of recycled poster board and drew 4 shapes on it.  A few of my students helped to color in the shapes.

Next, I took the target outside to our playground and taped it on the building wall (using Mavalous tape - have you used this stuff?  It's AWESOME - this tape lasted us multiple times of taking the target off the wall and putting it back up again and it's still sticking on a wall in my closet for the next time we use it).

I placed a container of bean bags about 5 ft from the target and we took turns throwing bean bags to see which shape we could hit.  The students would practice their shape names with each hit.  I watched their accuracy and had the more experienced throwers see how far back they could stand and still hit the target.

It was a great way to work on throwing skills and practice shape recognition!


Wednesday, November 7, 2012

Alligator, Bear, Bumble Bee

I'm thankful that every school year is a little different.  Different kids make for different dynamics in the classroom which leads to different learning activities.  It takes a season of trial and error to figure out what activities will engage a group of students.  I've been "learning" my class; their interests, strengths, weaknesses, likes and dislikes.    When I'm planning I try to balance between activities that I know will engage the kiddos and activities that are a little more experimental - so we can all expand our boundaries a little.  

Here are some activities we did while reviewing the letters "A" and "B" that were new to my curriculum this year:

ALLIGATOR TOSS:

To create the container I enlarged a picture of an alligator on our photocopier and then traced it onto a piece of green card-stock (if you want the alligator to last longer than 2 weeks I'd recommend using heavier cardboard or laminating)  I then taped the alligator to a plastic container to create a space to catch objects.  We tossed plastic apples (from our housekeeping toys) into the alligator's mouth - nom, nom, nom! (inspiration was from here)


BEAR STICKY TABLE

I love the idea of using contact paper sticky side up (inspiration @ Teach Preschool - search "sticky table").  This was our first experience with the sticky table this year and it was fairly successful.  I really liked that the contact paper gave traction with our ity-bity bear counters - lots of help for small, uncoordinated fingers.  


BEAR SORT AND COUNT

For a group activity I used some bear sorting cards that I made on Publisher.  To begin I placed one bear of a different color in each pocket on the chart.  I passed out a small number of bears to each student and they had to bring the bears to the pocket chart and match them to the correct row.  After we had matched all the bears we looked to see which color of bears "won" - practicing comparing sets!


BUMBLE BEE

Product Details The book "Bee-Wigged" is hilarious on a variety of levels. Jerry Bee is an enormous bee that has no friends because everyone is scared of enormous bees.  Jerry's life is transformed with the discovery of a wig...  We read the book together and made our own bumble bees that looked like "Jerry Bee" (minus the wig). 
 
To make these bees I used:
  • Yellow construction paper, cut into a large oval (body)
  • Black construction paper, cut into strips and accordion folded (legs)
  • White construction paper, cut into small circles (eyes)
  • Markers (to draw a face)
  • Black paint (to add stripes)
My students chose to complete this project in a variety of different ways - they turned out really cute.


Tuesday, October 2, 2012

some september fun


Wow, it's already October!  In my last post (over a month ago - sheesh!) I talked about being flexible.  Well, my flexibility has definitely come in handy this school year.  I'm the director of our two campus program (teach part-time/direct part-time) and as such, I end up being the person who fills in the holes, or goes to the place that makes the most sense with our enrollment and current staff.  Well, with the new school year I had to make a switch to a different class on our smaller campus.  Instead of a class of 15-20 kiddos I'm running a group of 5-10 (so different! - I can actually sit at a table with the students and do art with them instead of running 5 directions at once!).  I'm really enjoying my new class and we've been having a great time together.  

Here are some of the things we did this last month:

Product DetailsFor our first week we take time to become familiar with school routines and for our curriculum we focus on colors.  "Curious George's First day of School" was a great story to help introduce both the subject of school and color to the kids.  In the story, George visits a classroom and discovers all the things the kids do at school.  While visiting George also gets into the paints and creates all sorts of colors and, of course, a mess.  We didn't do the mess part, but we did do lots of color activities including color mixing with paint and shaving cream, ice cubes, and eye droppers.  (Sorry no pics - it was indeed the first week of school and my ducks were not in a row!)

Product DetailsThe second week of school we focused on shapes.  I LOVE the book "Mouse Shapes" and all of my students loved it too.   
In this story the mice hide in shapes and entertain themselves with creating pictures out of the shapes.  
For some hands on learning I gave each student a piece of black felt (8"x11") for a background and multicolored felt shapes. As I was reading the story the students were able to create their own pictures with the felt shapes.  (This idea is not my own, but a combination from inspiration around the web.)  
We left the book and the felt pieces out for further exploration at a center area.

Make a Square

For this quick activity I gave everyone 4 pipe cleaners.  We lined them up to see if they were all the same length.  Then, we discussed how all the sides of a square are the same length.  Could we make a square out of our pipe cleaners?  Yes, we could!


For more activities with colors and shapes see these posts: "Exploring Color" and "The shape of things".

Saturday, August 25, 2012

learning center organization

Ready or not, here it comes!  This summer has been an amazing time to step back a bit, go through closets, cupboards, arrange, re-arrange, clean... I'm feeling much more ready for this school year than I have in past years.  

However, with the way our enrollment usually goes there is only so much you can do to get prepared.  Inevitably there are always new students who enroll at the last minute and a new to-do list grows to meet those new needs.  If there's anything I've learned from teaching preschool it's to be FLEXIBLE - in the last 10 years I've gone from (metaphorically speaking) barely being able to touch my toes to doing the full splits!

With the new year always comes new ways of organizing things.  Our program is based in our church facility so we share space with our Children's Ministry.  Sharing space can be kind of a monster, especially when you don't share many items in the room itself.  We have to clean up most of our preschool belongings weekly to store them away for the weekend and then set up again on Monday morning before school begins.   Because of this process, I'm always thinking of ways to make set-up and tear down efficient.

Learning Center Drawers
 
I believe this idea was inspired by The Mailbox.   (You can sign-up for weekly ideas to be sent to your inbox from The Mailbox.com here.)  

To help corral my weekly learning centers I decided to buy two sets of plastic drawers.  The drawer units fit in one of my cupboards and the drawers themselves are removable.    Each drawer is labeled with the center theme (Language, Math, Art, etc.).  To create the labels I used Publisher's Word Art function, printed them out, cut them to fit, and used contact paper to stick them on.  
I was debating whether or not to decoupage the drawers (I've seen some cute ideas on Pinterest) but I decided I wouldn't get too fancy just in case I decided this organizational tool doesn't work for me.  


I'm planning on filling up the drawers on Friday with the center supplies for the following week then taking them out on Monday to place in a center area.  The drawer should provide an easy way to corral center supplies and be easy to get out of the way when we need table space for other activities.  I'm also hoping that they will work well when we have a substitute - they will have activities at their fingertips!

Are you ready for your school year?  Do you have any fabulous new organizational ideas you're implementing? 

Miss Eileen


Monday, July 30, 2012

now i know my a,b,c's

Alrighty, here follows the rest of our alphabet activities from this past school year.  Enjoy!

Letter V

Our animal friend for letter "V" is a vulture - not a super glamorous animal.  My favorite memory association with this animal is the scene from Disney's "The Jungle Book" where the vultures are hanging out trying to figure out "what we gonna do?".  I pulled up the video off of YouTube to show to my class - fun times : )

We also made Violet V's; mixing purple and white paint and finger painting violet construction paper.  We cut out the letters after they dried.


 Letter "W" 
...for worms (of course!)  To decorate our "W" I gave the kiddos lengths of brown yarn to cut into "worms" - they loved using the scissors to cut up the yarn.  After they had cut their "worms" they glued them to a brown letter "W".


Letter "X" 
Such a hard letter to work with, but fun to make!

 We made smaller "X's" out of toothpicks - it was great exploration working with glue and wood - some of my kiddos got REALLY into it.


Another center area we had for "X" was an "I Spy" table.  I put various foam and cardboard letters on the table and covered them with contact paper. I challenged the students to find as many "x's" as they could (counting and recognition!).  I also added blank paper and crayons so students could do rubbings of the letters.


Letter Y

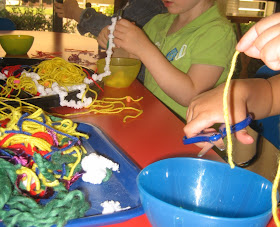
I have lots of yarn scraps - lots of different colors and textures.  I placed them at a center area with scissors and containers and let the kiddos have at it.  They LOVED cutting the yarn up - great fine motor fun!
At the end of the week we used our cut up yarn scraps to decorate our big "Y".


Letter Z!!!


Of course we made Zebras - these are sooooo cute!  We pre-cut stripes, tails, ears, and a mane.  The kiddos used the supplies to create their own zebra "Z".


Zoo Mural
To end our animal alphabet we created a class mural of the zoo.  The kiddos  drew their favorite animals, trees, and other things found at the zoo.  We also glued on pictures of animals.  Great teamwork project!

Sunday, July 15, 2012

The beginning of the end... R,S,T,U

The end of the school year is such a whirlwind of activity.  I had a crazy spring and am just now feeling recuperated from it all.  Blogging definitely fell off the "to do" list for awhile - I'm amazed by all those who can keep up a daily or even weekly blog - AMAZING!

Here are more alphabet activities that we did in our class...

Rainbow, Rectangle "R"


We cut out rainbow colored rectangles to glue on the letter "R" .  We had discussed rainbow color order during the spring and some of my students were keen on gluing their colors in the correct order.  Others were more creative with the process - one student make a rainbow road! 

"S"  is for Snakes


I wasn't able to get a picture of our large "S".  We glued on wiggle eyes and a forked tongue to create a snake.
We also created snakes from pipe cleaners and straws.  I copied pictures of snake heads onto card stock,  cut them out and hole punched them.  Then I threaded a pipe cleaner through to create the snake's body.  The snakes and straws (cut into 1" pieces) at a center area.  The kiddos threaded the straws onto the pipe cleaner to create their own snake.  Great fine motor work and great practice for making patterns!

 Tiger "T"


Super simple letter "T" art - use an orange "T" shape, add black stripes (made from construction paper or electrical tape)!  

"U"  is for Umbrella

The kiddos had fun with this project.  To make umbrellas to glue onto our "U", we folded decorated cupcake liners (I found princess and cars themed liners :) in half and added a toothpick for the handle.  


Wednesday, May 23, 2012

queen for a day


If I were queen for a day I would want to accomplish my entire to do list in one day with no problems, set backs or hang ups (or wait, I could have someone else do it!).  If I were queen I would have time for everything I wanted to do, including blogging!  BUT, reality would be that I'm NOT queen for a day and all my days this spring have been running away from me madly, with problems, set backs, and hang ups at every turn.  

Did I mention that along with teaching and directing full time I'm working on attaining my Child Development Associates Degree (CDA)?  I'll have to blog a little about the process this summer (when I'm finished)... but for now I'm hoping to catch up on all the fun times we've been having in preschool this spring.

At least we can spend time imagining in the preschool classroom and when we learned letter "Q" that's exactly what we did!  

Queen For A Day


Oh my, add a few princess dresses to the dress-up box and look what happens... my girls were in heaven!   I realize playing "Queen" is a little gender specific, but we encouraged our boys to be Kings, Knights, and Princes to save the day - and they did!


Quilted "Q" 


We glued fabric squares onto a construction paper "Q".

Class Quilt 

(inspired here by Teach Preschool)

 To make our "quilt" I took a piece of butcher paper and taped a grid with masking tape.  To decorate I placed it on the floor with a collection of markers and crayons for the kiddos to color together. 

Q-Tip Paint and Print


I have a collection of lids/trays that I use all the time for paint projects.  They are great for holding paint when finger painting and make a wonderful surface for experimental painting.  On this day we used q-tips with a mix of green and blue paint.  The kiddos were able to make all sorts of designs on the trays with the q-tips.  When their designs were complete, we pressed a piece of paper on top of the paint to make a print of their design.