Pages

Tuesday, September 27, 2011

alligator soup

One of the core words in my life is "balance."  I'm extremely fond of living in the middle between the extremes, using a bit of each perspective to create my own recipe for life.  Our preschool program has developed out of this philosophy.  
 
When I began working at our school I was introduced to ABeka's preschool curriculum.  It is a curriculum for Christian schools (written way back when) that our school has used for many years.  In my opinion, the program in its purest form is very structured and way too intense for preschool and  it definitely does not fit the current trend for play-based learning.  As much as I dislike the intensity, I've chosen to keep the curriculum.  This gives our students some continuity when they move on in our school (our Kindergarten and other grades use parts of the curriculum also).    Over the years, I've let the curriculum become the base of our program and  I've mixed in other ingredients to go with it - balancing between a "structured school" and "play" environment.   

Some things to know about how I structure my class activities:
  • I use Abeka's curriculum for parts of my activites
  • My class is a mix of 3's & 4's - I try to offer activities for various developmental levels as well as activities that can be adjusted based on skill level
  • We are a "letter of the week" program - not that the rest of the alphabet gets left out of the mix - but it gives us a focus for each week.  Our 3's focus on 2 letters for 2 weeks and and then have a review week
  • We have monthly themes - which gives us even more to do : )  Sometimes it is a bit much so I choose to focus on what my students are interested in or what I'm excited about teaching
That being said, here are some of the activities we did for week 3 (focus letter "Aa"):

Sensory Table, Alphabet Soup: foam alphabet letters, beans, spoons, and bowls (inspired by playinghouseinmaryland.blogspot.com)


Alligator Eggs: large plastic eggs (always a winner!), laminated baby alligator cut-outs, other pics that begin with "A", metallic gift filler (from dollar store)

 Alligator Count: alligator magnets (clip art copied on card-stock, cut out, attach magnet on back), number magnets


 Alligator "A's" (inspired by notimeforflashcards.com) they turned out so cute! (For projects that require glue I put white glue in a paint container, add a little water, and have students apply with a paint brush)


Friday, September 23, 2011

The shape of things

As we continued to become acquainted with each other and our new routines at school we took the opportunity to focus on shapes.  We had various play centers (as always housekeeping, blocks, cars & library) plus a few centers dedicated to shapes.  I kept the paper in the sensory box (see my post about color) and posted a new shape to search for each day.  This was only a hit when I pulled the box into a circle time activity and had everyone find four rectangles - then we couldn't get enough!  

A shape sorting center helped connect our color and sorting skills.  I found printable shapes at mathsisfun.com, cut them out, and put them on the table with our color mats.  I will definitely reuse these shapes throughout the year for various activities.


Our main project for the week was to make a shape book.  I created a simple cover on publisher.


Each day we made a new page for our book.

Page 1: Square Rubbing, sandpaper squares and crayons (use tape to prevent the paper from slipping!). 
We had mixed results with this activity, my younger 3's didn't quite get the concept.


Page 2: Circle painting, tp rolls and paint


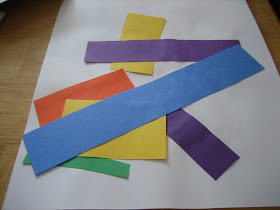
Page 3: Rectangle collage (we did the rectangle search in the sensory box prior to this activity and reviewed how to use glue sticks)


Page 4: Triangle paint, triangle cut sponges & paint
(I use lids from some of my storage containers for paint and a place mat on the table to catch paint - they work great!)


To bind the book I simply punched a hole in the top corner and tied with some cute ribbon - simple and quick.


At the end of the week I pulled out the tp tubes and the triangle sponges and had the students paint again exploring colors and shapes.


Monday, September 12, 2011

Exploring Color

The first weeks of preschool are always an adventure.  There is SO MUCH  for everyone (teachers included) to learn! The backdrop of the first week of our preschool class is color exploration.  While we're figuring out how to let mom go for a few hours, learning new names and routines, we also talk about colors.  Do we know the names of all the basic colors?  What's your favorite?  Can you draw a rainbow?  Can I find all the matching colored objects?  What happens if we mix different colors?  
Here are some of the activities we explored: 
Color Sorting Trays:  For color "mats" I glued a color name onto a matching piece of construction paper and placed each "mat" into a page protector.  Then, I collected a box of random toys, objects and flash cards to sort.
Each day we concentrated on a few different colors.  The day we learned about purple and orange we also learned about scissors (I love the "fringe" that new scissor users make - it seems to be a pretty universal step in scissor use : )

What do you see?  I found this looking glass template in a Mailbox Number's book.  I photocopied it onto card stock, cut it out, and taped colored cellophane in the middle

Mixing it up - I think using paint during the first week of preschool is crazy - but I found a way to incorporate it successfully.  We added two colors of paint into a Ziploc bag, taped it shut and squished away - no mess!  AND you get to create new colors!

Sensory Box: Various sizes and shapes of paper mixed with raffia and colored bowls for sorting.  The favorite activity at this center was creating pictures from the shapes.

Saturday, September 10, 2011

A new season


I had the realization as I walked through a craft store for the umpteenth time this summer that I was going a little crazy with my classroom planning this year.  I was wondering at my excitement when I realized that it's been almost two full years since I had my "own" classroom.

This last season at our little preschool has been one of expansion; I had gone from teaching/directing a half-day program (working with one other teacher) to managing a full time program that had grown to three campuses and ten staff members!  My focus had been on the larger picture and I had a HUGE learning curve with all the changes.  This summer calmed down quite a bit.  Our stretched boundaries settled into a smaller, more manageable space, and I have been able to settle into teaching 1/2 day once more -  thus the excitement at preparing for my class this fall.

Our preschool is located in our church facility and is a shared-use space.  This helps us to be very organized, clean, and creative with our classroom set-up (that is all positive spin ; ).  Our Children's Ministry team does all the theme decoration so we work with what we have.  My classroom is currently a little sparse so I decided to give it a little more oomph and go with the "Safari" theme that was already provided by our church.  I added touches that could stay in place for the weekend and expanded some of my classroom items to include the theme.
We have open shelving storage that is difficult to use in a room shared with other weekly activities.   I decided to make curtains to cover it up - out of sight out of mind!  To make the curtains, I used a shower curtain from a discount store, added the cheetah fabric border at the bottom and placed on suspension rods. To decorate the top of the shelves I added some "greenery" and a few safari animals.


Below the curtains are white cabinets - I added some monkeys for fun : )
My walls grew vines for some monkeys to swing from (vines are made from crumpled brown paper - I used "sticky stuff" to attach them to the wall)
My student file box got a new sign
My cubbies got a new background (printed from publisher, covered in contact paper)
My carpet squares were "rebound" with animal print duct tape


Our room has wonderful ceiling to floor windows - the light is fabulous until nap time.  I've been wanting to add curtains for several years to help darken the room in the afternoon.  To make these curtains, I bought sheets at a discount store and added the cheetah print border to give them a little character.  To attach them to the window I used Velcro - they can come down easily when needed for other church activities and I didn't have to spend time or money on installing curtain rods.