I'm thankful that every school year is a little different. Different kids make for different dynamics in the classroom which leads to different learning activities. It takes a season of trial and error to figure out what activities will engage a group of students. I've been "learning" my class; their interests, strengths, weaknesses, likes and dislikes. When I'm planning I try to balance between activities that I know will engage the kiddos and activities that are a little more experimental - so we can all expand our boundaries a little.
Here are some activities we did while reviewing the letters "A" and "B" that were new to my curriculum this year:
ALLIGATOR TOSS:
To create the container I enlarged a picture of an alligator on our photocopier and then traced it onto a piece of green card-stock (if you want the alligator to last longer than 2 weeks I'd recommend using heavier cardboard or laminating) I then taped the alligator to a plastic container to create a space to catch objects. We tossed plastic apples (from our housekeeping toys) into the alligator's mouth - nom, nom, nom! (inspiration was from
here)
BEAR STICKY TABLE
I love the idea of using contact paper sticky side up (inspiration @
Teach Preschool - search "sticky table"). This was our first experience with the sticky table this year and it was fairly successful. I really liked that the contact paper gave traction with our ity-bity bear counters - lots of help for small, uncoordinated fingers.
BEAR SORT AND COUNT

For a group activity I used some bear sorting cards that I made on Publisher. To begin I placed one bear of a different color in each pocket on the chart. I passed out a small number of bears to each student and they had to bring the bears to the pocket chart and match them to the correct row. After we had matched all the bears we looked to see which color of bears "won" - practicing comparing sets!
BUMBLE BEE
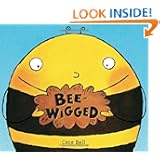
The book "Bee-Wigged" is hilarious on a variety of levels. Jerry Bee is an enormous bee that has no friends because everyone is scared of enormous bees. Jerry's life is transformed with the discovery of a wig... We read the book together and made our own bumble bees that looked like "Jerry Bee" (minus the wig).

To make these bees I used:
- Yellow construction paper, cut into a large oval (body)
- Black construction paper, cut into strips and accordion folded (legs)
- White construction paper, cut into small circles (eyes)
- Markers (to draw a face)
- Black paint (to add stripes)
My students chose to complete this project in a variety of different ways - they turned out really cute.

 I placed a container of bean bags about 5 ft from the target and we took turns throwing bean bags to see which shape we could hit. The students would practice their shape names with each hit. I watched their accuracy and had the more experienced throwers see how far back they could stand and still hit the target.


